

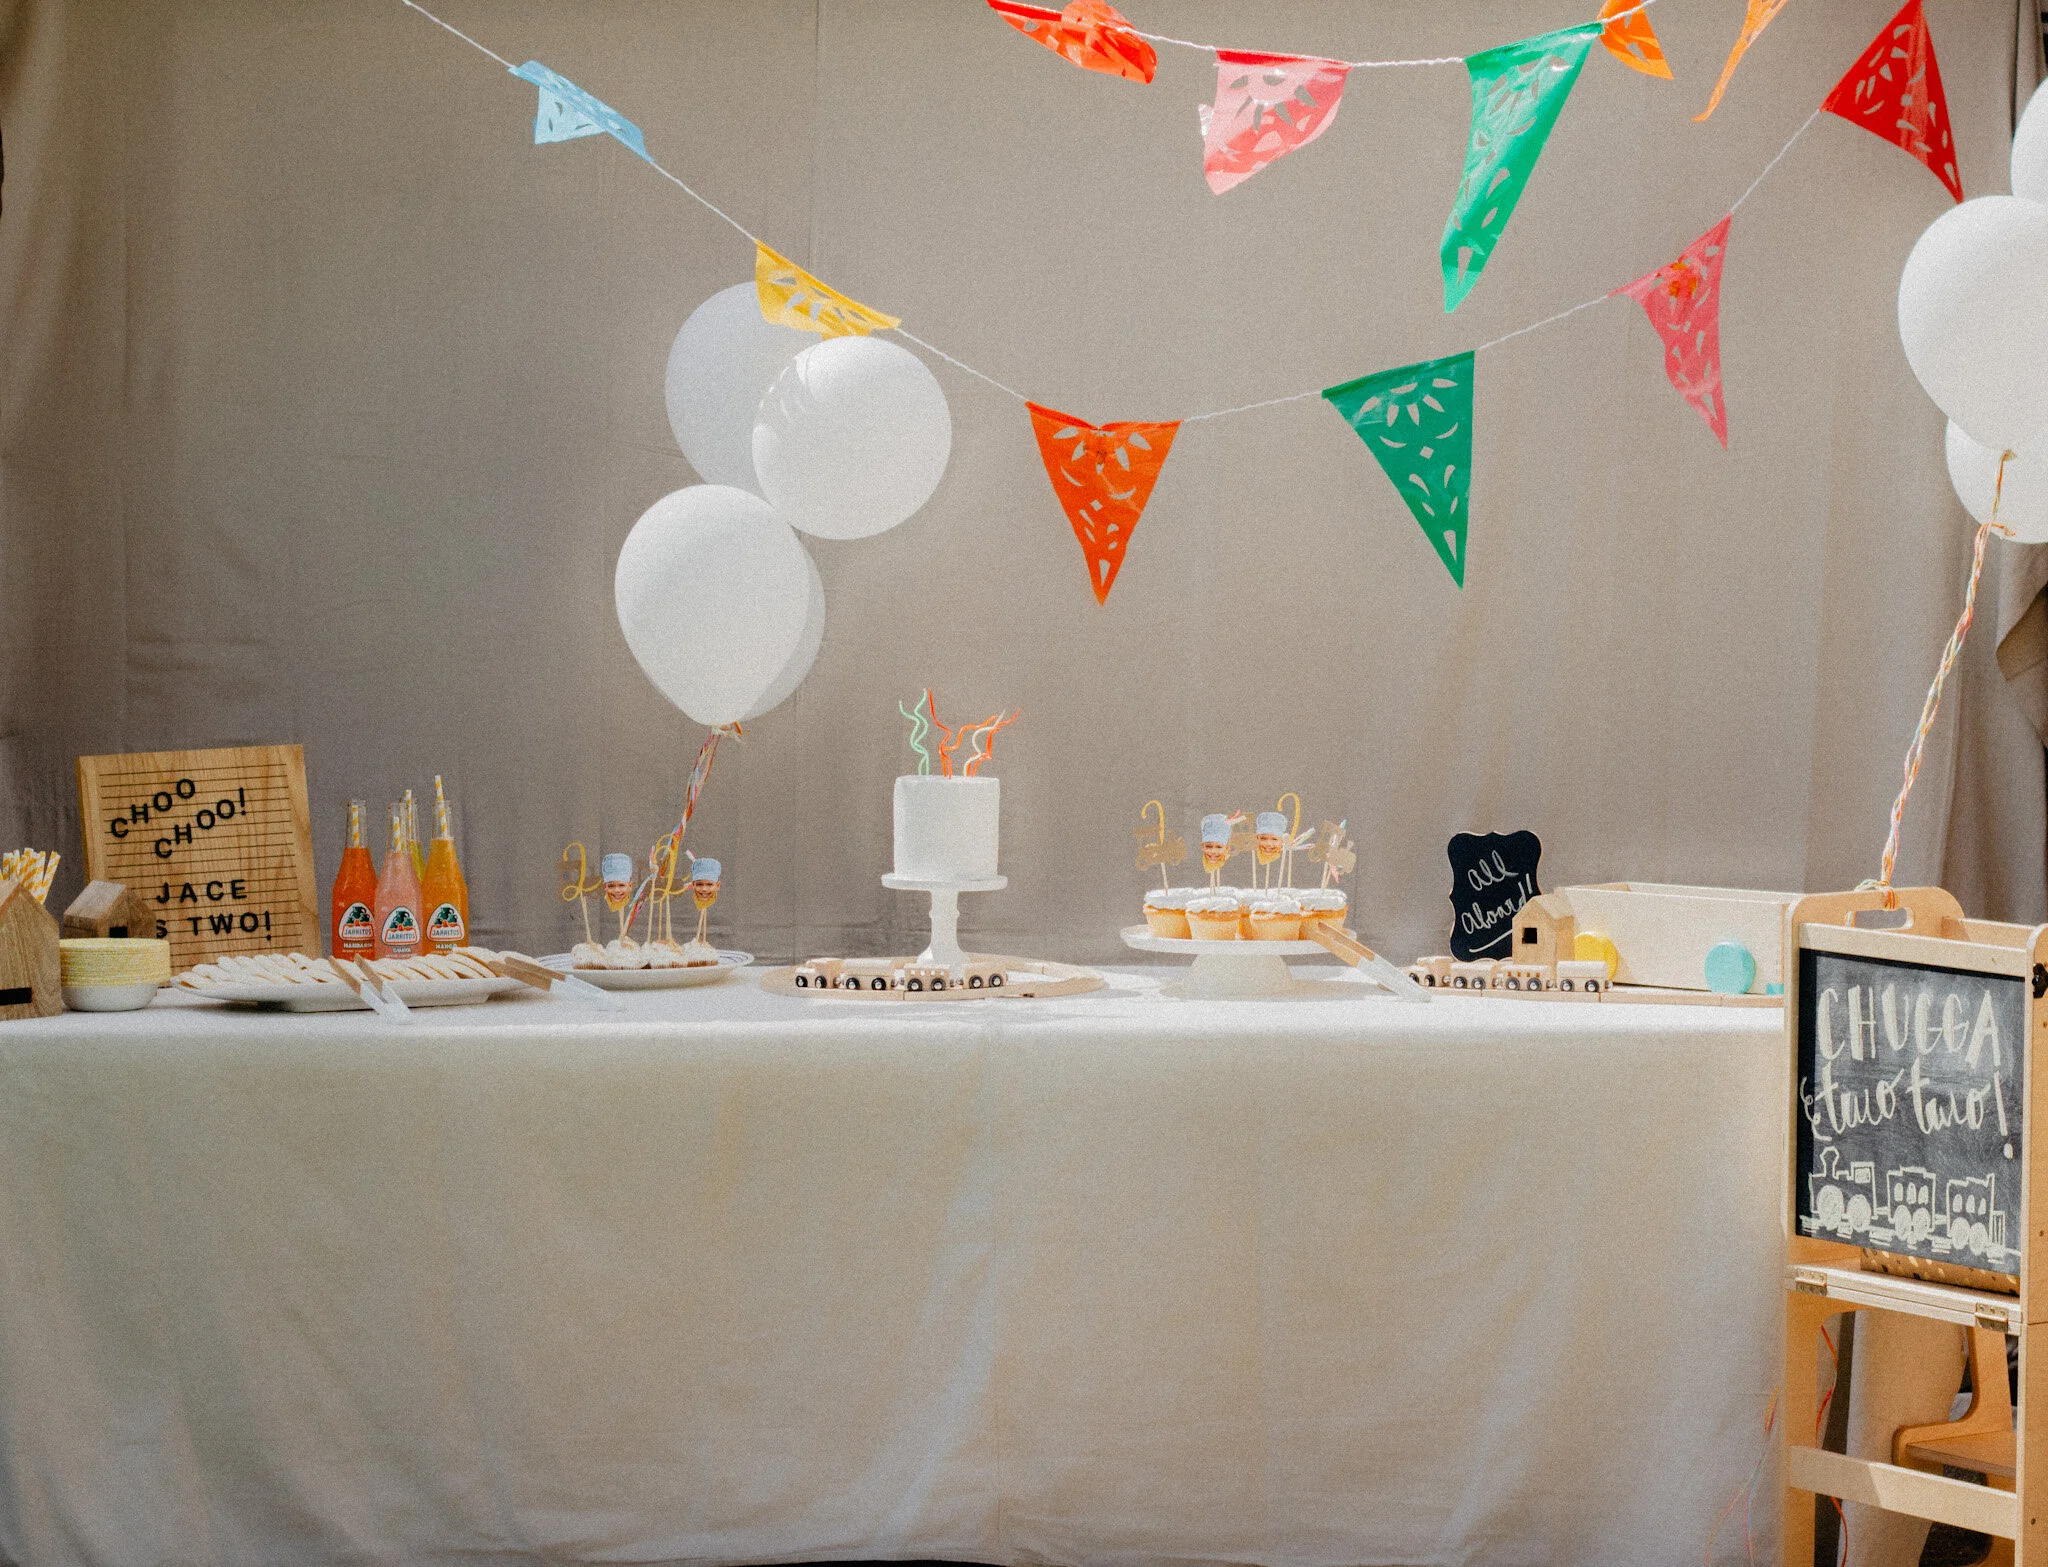
A Chugga Two Two Birthday Party!
Jace turned two this September and being that he is literally OBSESSED with trains, we couldn’t help but jump on the “Chugga Two Two” train theme this year! The only problem I was having was finding an aesthetic I liked and that wasn’t “Thomas & Friends” puke everywhere. Nothing against Thomas, we love him! That being said, this turned into a major DIY birthday project to achieve my vision which I describe as, ‘vintage train theme with a fiesta twist’! Fun right!? From cupcake toppers, to piñatas, to train whistles, keep reading to see how I achieved this look on a budget! If you’re more of a visual learner, watch my vlog here!


SHOP THE PARTY

LET’S START WITH INSPIRATION
I always begin by jumping on my Pinterest and searching the obvious terms to see what ideas will pop up. I only pinned the parties that I thought genuinely stood out and I’d be able to DIY. I was especially drawn to a specific look that included natural wood elements mixed in with colorful little details. I already had a ton of items at home in mind that I could incorporate and I loved the idea of combining a vintage + fiesta look!
CUPCAKE TOPPERS
To be honest, this was the most exciting DIY for me. I planned on getting simple white cupcakes (to save money) with no added design, which means I needed to incorporate the actual theme within the toppers. I knew I wanted a variety of 3-4 toppers including trains (duh), the #2, and Jace’s cute little face somehow. But as I began to look online, I just could not find the exact style to match everything, so of course, I said LET’S MAKE IT! I used my Cricut machine and program to design a simple stylized train cut out on brown cardstock. I also created some cursive yellow number twos! Simple and CUTE! Now for the star of the show: Jace the Conductor. I was inspired by these photoshopped train conductor toppers on Etsy. I felt I could easily make these to save money and that matched my color scheme better. I chose my favorite smiling photo of him, and used the Picsart app to photoshop a hat + bandana, then printed them up at Walgreens! After I hot glued all my toppers to the skewers, I had a few extra ball top cocktail skewers left and made a simple fourth topper with the beautiful rainbow paper ribbon I bought for balloon string. I literally just tied a simple tie onto it, but I love that it added in that additional rainbow pop of color to the toppers.


KIDS TABLE
Being that there’s a bunch of kiddos in my family, ranging from infants to age 11, I always like to include a separate kids table for them to play and eat! My favorite thing to do is roll out my huge kraft paper and tape it right on top for one huge canvas they can color all over. I also lined up their goodie bags here which included wooden train whistles for each of them and a few extra wooden toy trains that Jace played with the ENTIRE TIME, hehe!


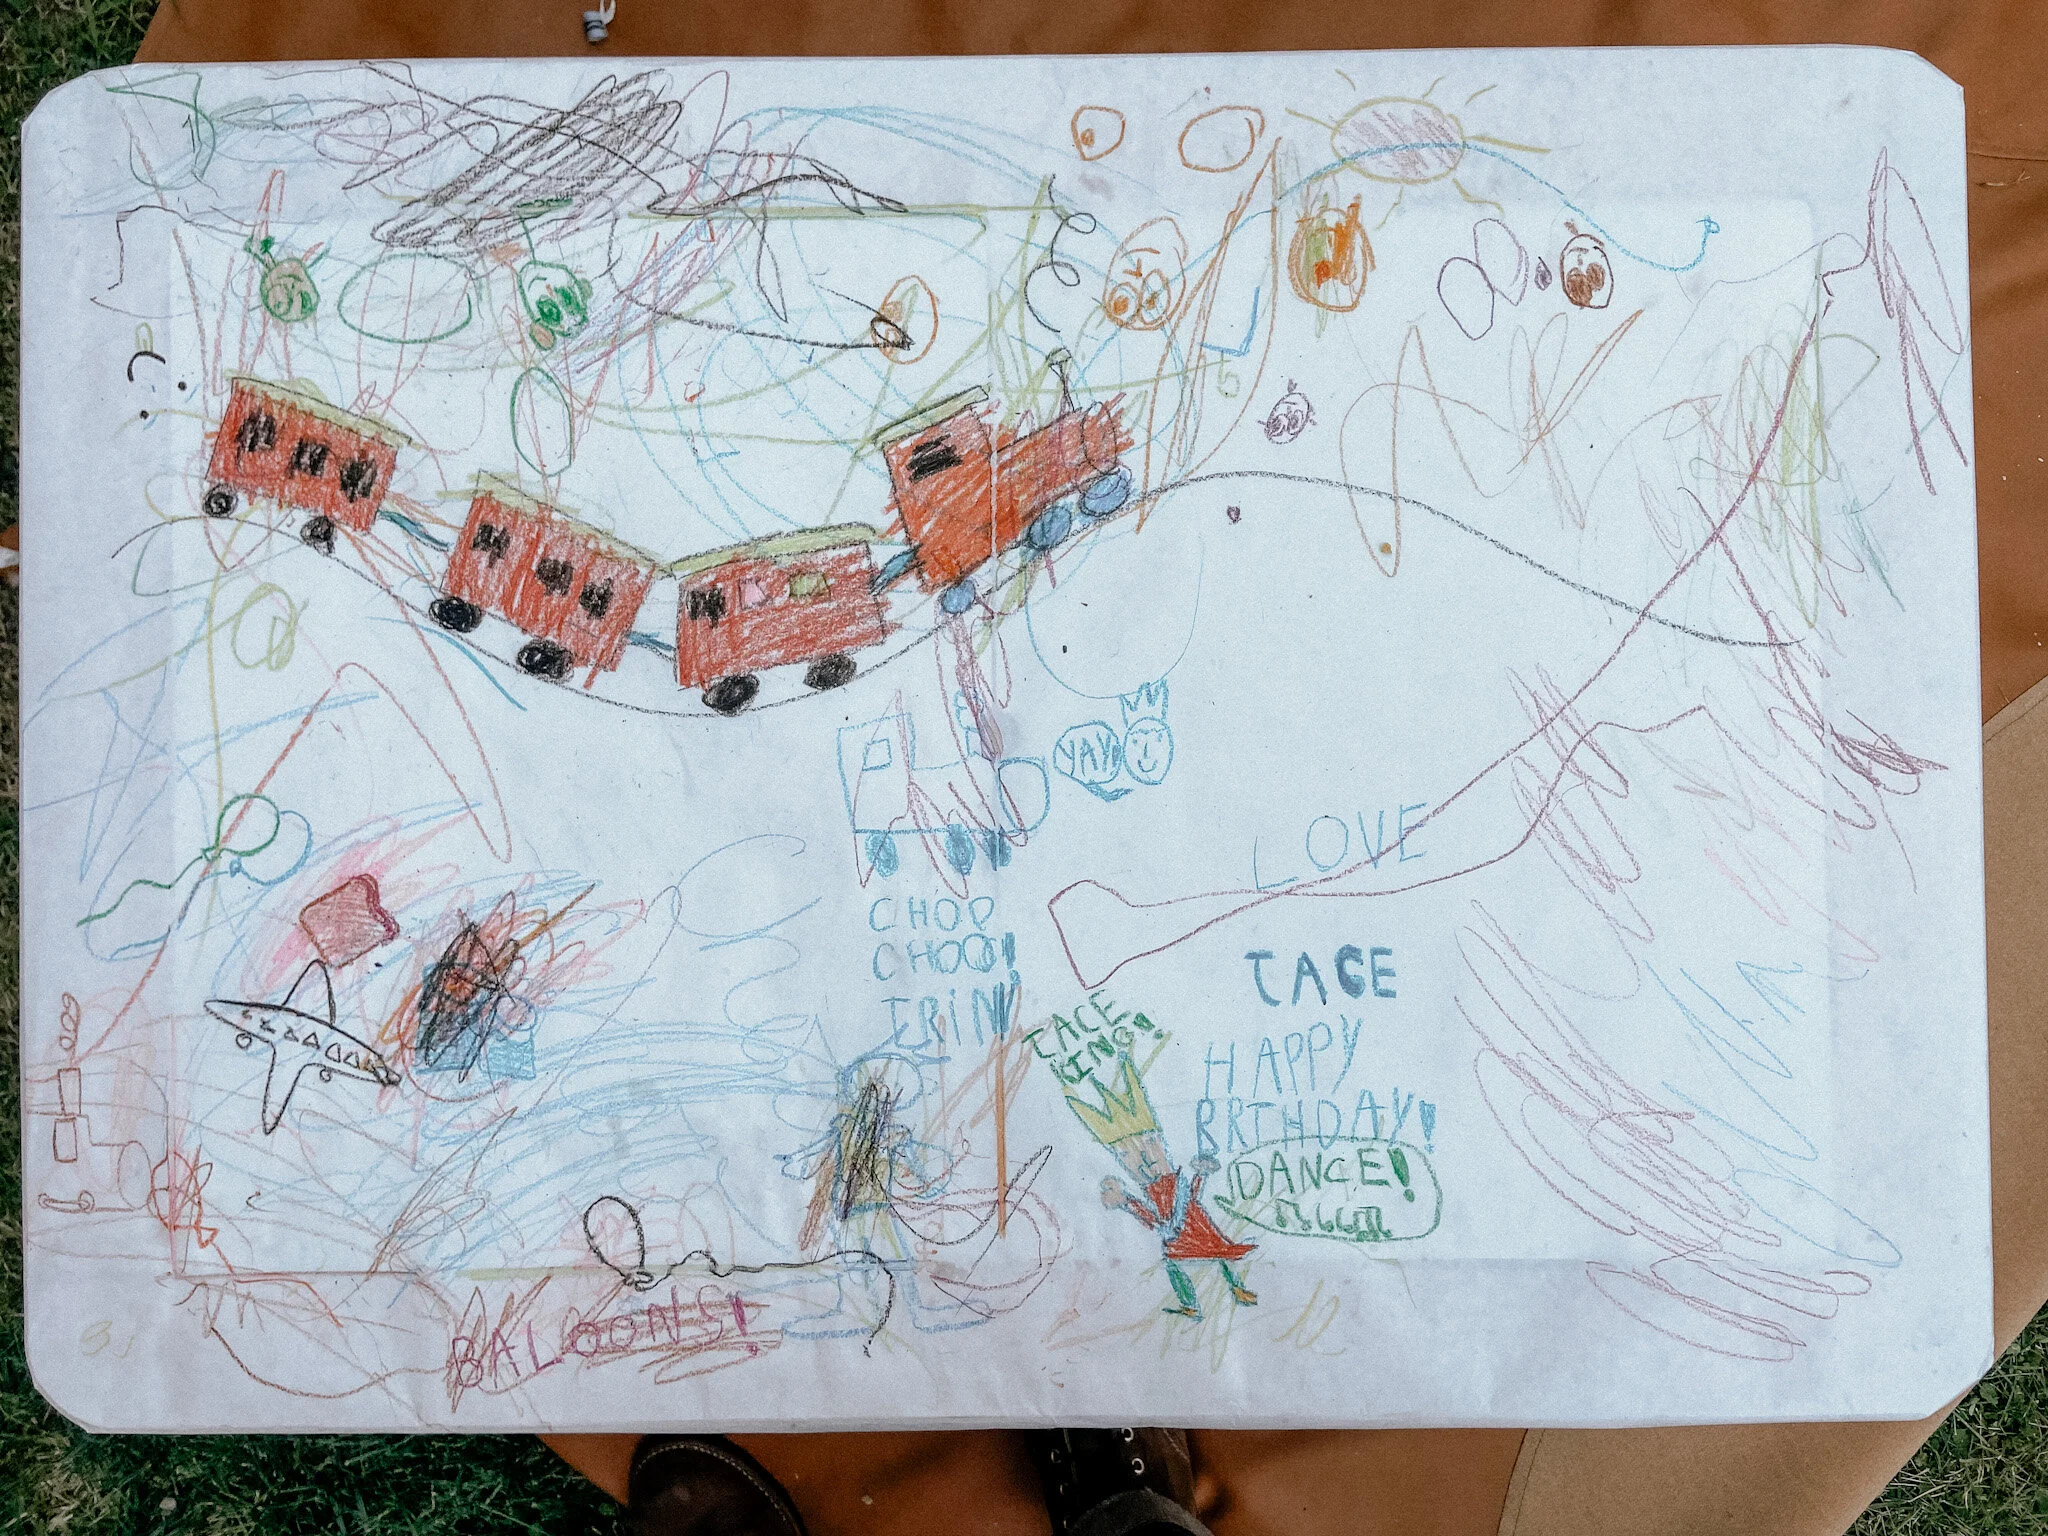
kids art is the best art :)
DIY TRAIN PINATA
There’s something you should know about me when it comes to piñatas: I take them very seriously. Basically I have a special place in my heart for homemade piñatas because my sisters used to make them for my birthday every year growing up. All that to say, I decided to pass down this tradition to my own children and custom make their piñatas. I did google “train piñatas” out of curiosity, and let’s just say, they’re not very cute. So DIY-ing a cute and colorful train piñata was the way to go! It took a few steps to make this right, but I’m happy with how it turned out and wanted to give you a little step by step guide in case you also hated all the google options out there :)

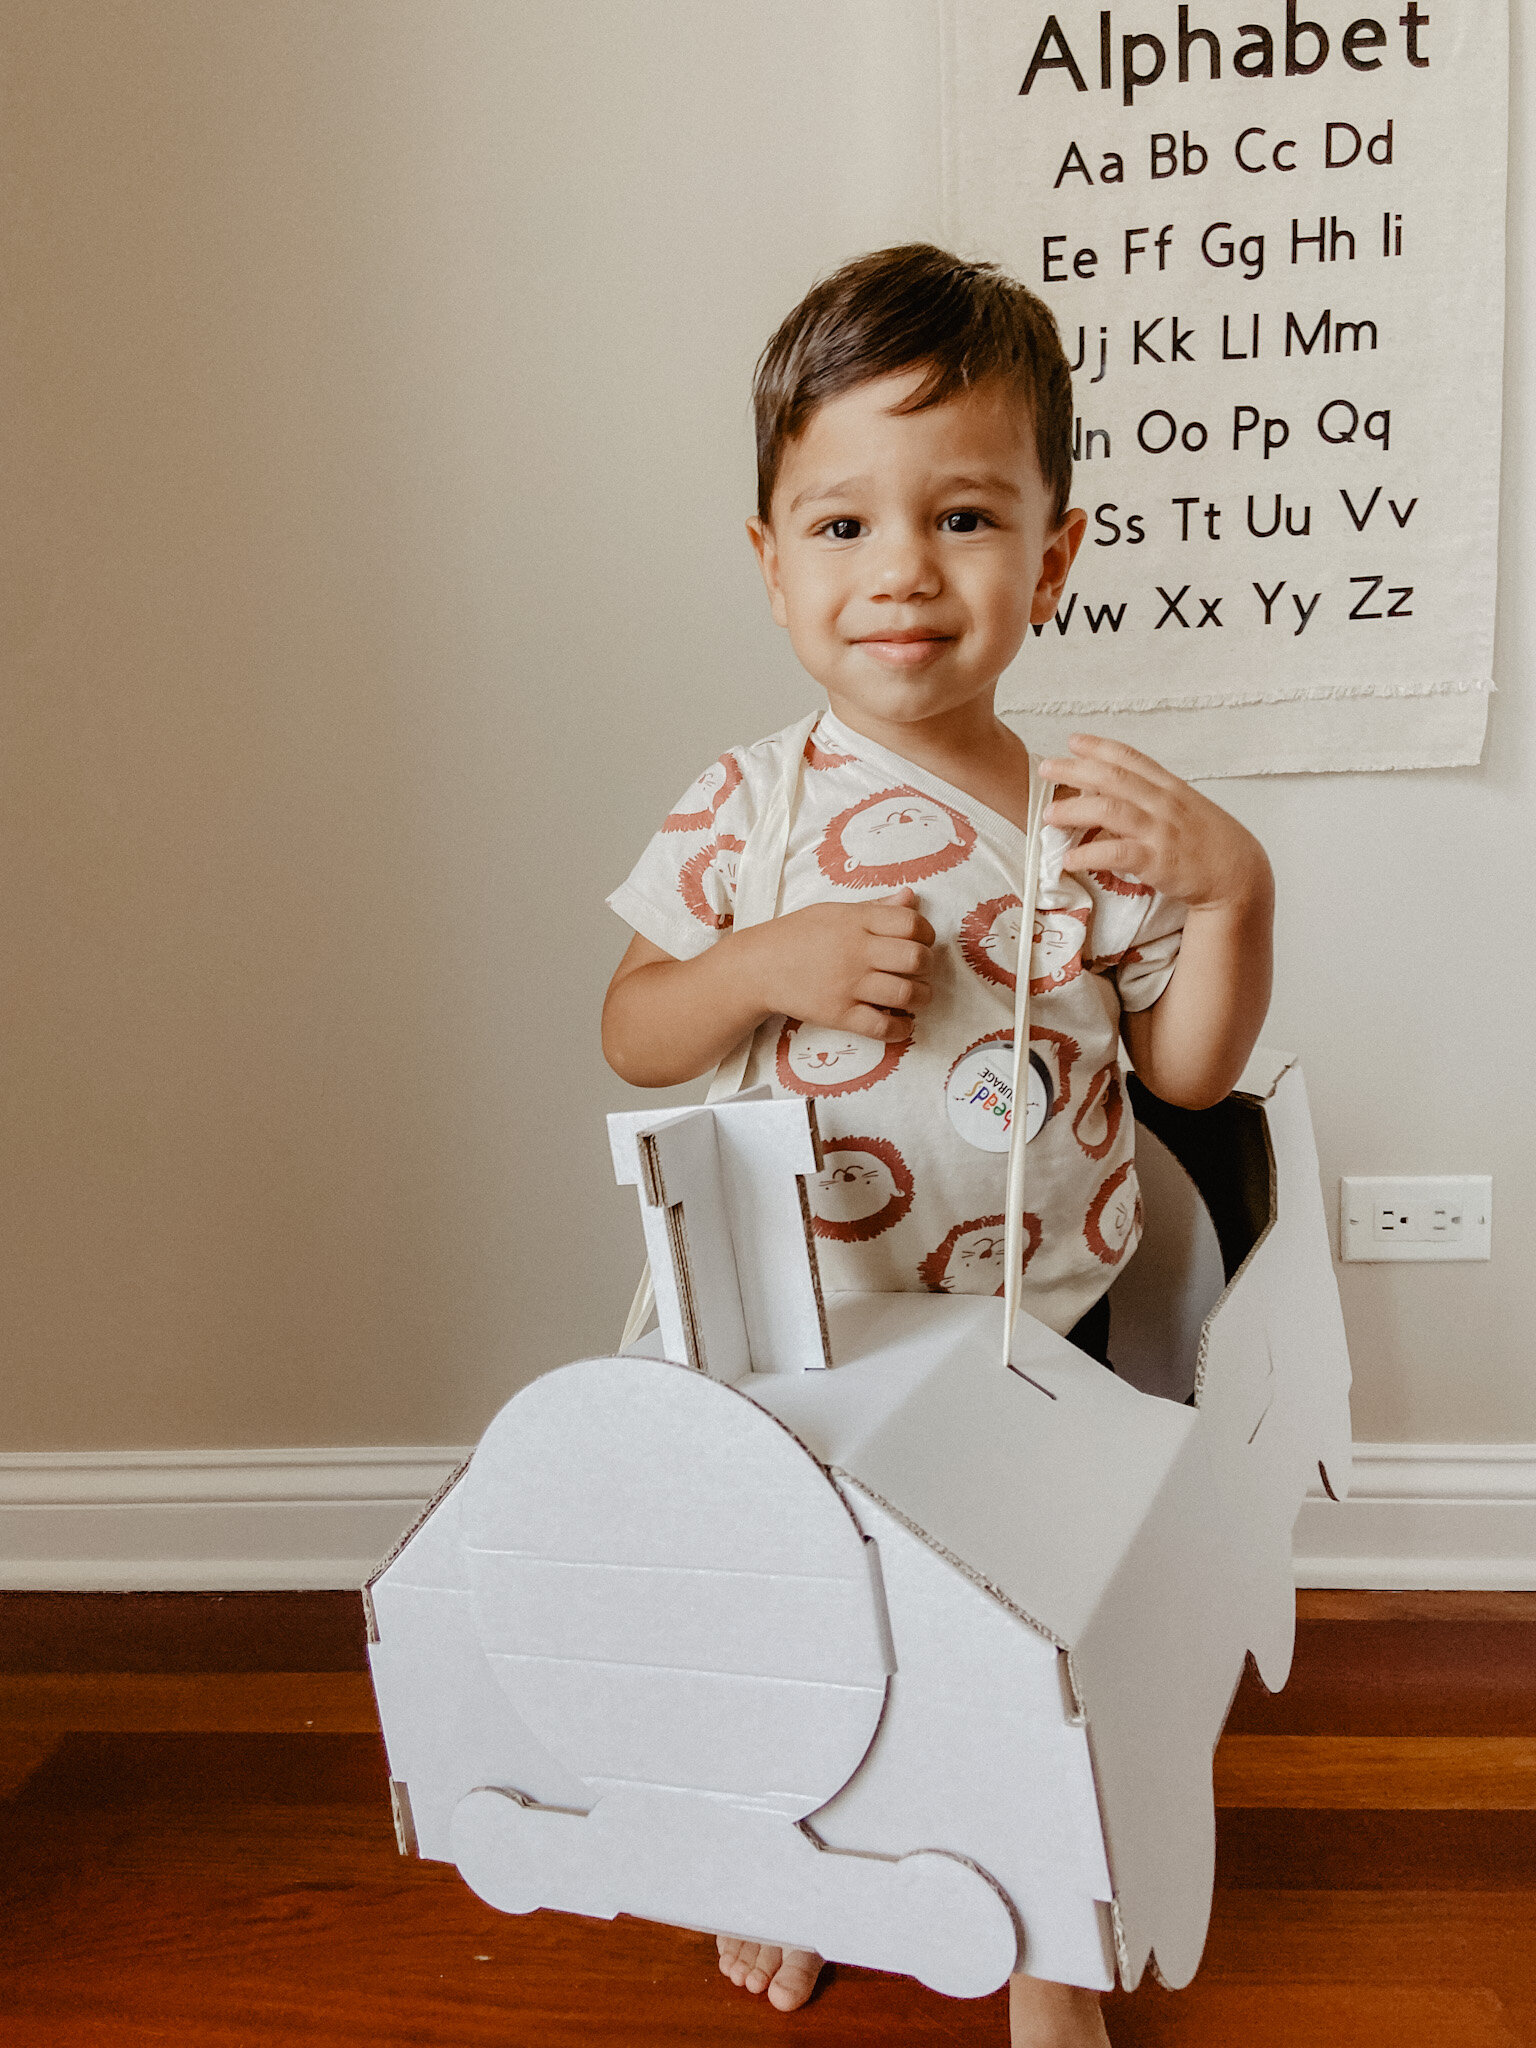
Piñatas typically start off with a cardboard base. I decided to skip the “construction” part of this and go ahead and buy an actual cardboard train. This one is actually a children’s train costume. As you can see, Jace isn’t too thrilled about wearing it. So he didn’t mind that I turned it into a Piñata for us to beat up! However, being that there were some open areas in it, I needed to cover them up with extra cardboard which I easily cut to size and used both hot glue and tape to secure it in place. I also left a small portion open on the top until after I filled it with piñata candy, then secured that area shut.


I chose multi-colored tissue paper for a very traditional fiesta-like piñata look and simply cut them into tassel strips! I attached it to the cardboard using hot glue and made sure to start with the bottom layer moving my way upwards. Check out my video below to see exactly how I made this work, as well as many of the other projects mentioned!


pin the image below to reference later!

